This project began when I needed a type of model railroad signal not commercially available. The specific signal that I needed was a 1:160 scale US&S H-2 Searchlight and TP-5 Color Light. I evaluated the market to see what was commercially available and how I could improve upon products already on the market. The Atlas Model Railroad Company makes a very similar Type G signal that could stand in for the TP-5 but its detail and build quality were not up to par so I decided to make my own. After reaching out to a variety of different photochemical etching companies in the US, I settled for a company in Scotland as they had no minimum runs and minimal setup cost, perfect for a hobby sized run product.
To minimize production and design costs, I decided to design my own phototool and have them custom chemically etched in nickel-silver (NS106), as they would be stronger than any etched brass kits (CZ108) currently available on the market in a comparable thickness. I had also considered the prospect of using stainless steel for maximum strength but because soldering is the strongest way of assembling these kits, I decided to stick with nickel silver.
This personal project introduced me to basic phototool design, testing and benchmarking with respect to self-developed constraints, requirements and project objectives.

Single photoetched fret, depanelized and ready for sale
One of the issues I ran into on an earlier revision of etched metal frets was that holes I had designed came out to be smaller than expected because of chemical photoetching tolerances. Holes that I had designed to be 1.5% over the outer diameter of the brass tubing I was using came out to be under the requirement, requiring slight reaming for a proper fit. In revision 1.4, this problem was remedied by making the holes 3% oversized which would still provide for a snug fit on the tubing with no interference issues.
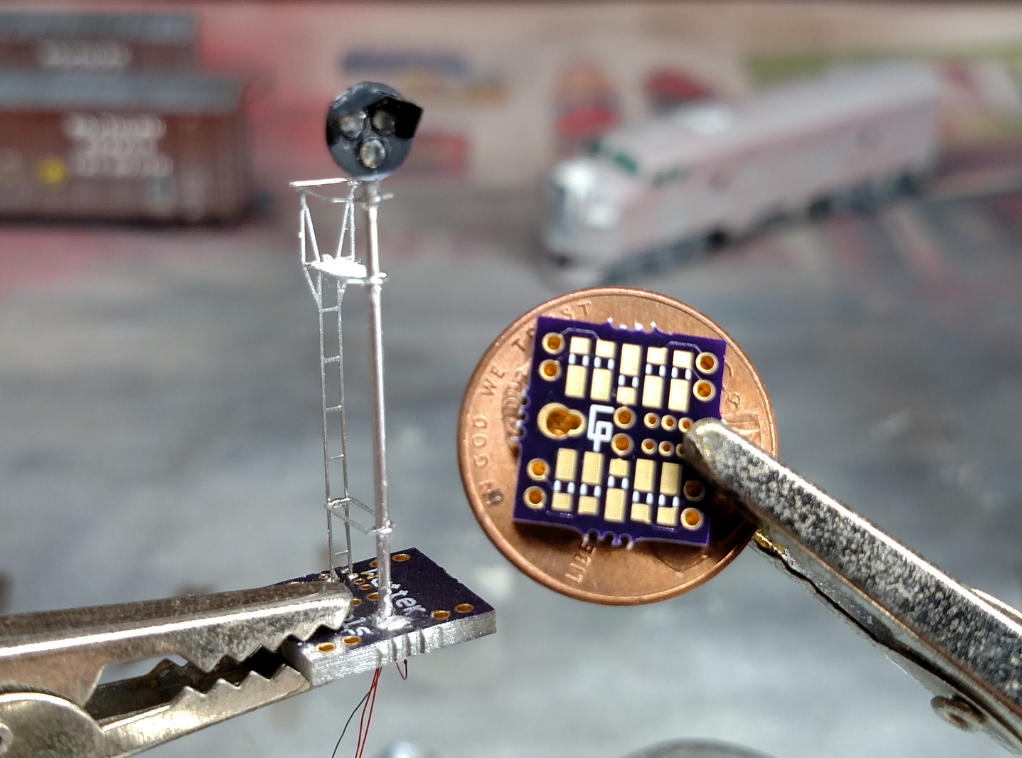
An assembled and painted sample of a railroad signal from revision 1.4, with custom PCB, ready to be mounted and wired up.
In order to light the signals up for prototypical operation, the hole sizes are designed to fit 0603 LEDs in the three lens "Type G" signal and a RYG PLCC for the single lens "Searchlight" signal. All the LEDs are wired with 38 gauge magnet wire in a common anode configuration to reduce the number of wires that need to be brought down the mast. A sample of this magnet wire can be seen above, coming out of the bottom of the mast PCB.
The main concept behind the PCB was to allow the end user to have a way to securely mount their signals on their layout and also have a way to transition delicate 38 gauge wire to a heavier and more durable 24 gauge for longer runs. Pads for 0603 resistors can be seen in the picture above as well as through-holes for 24 gauge wire. A press fit mounting base has also been developed for this PCB, so that the signal does not have to be permanently mounted, therefore reducing the chance of damage if accidentally knocked or bumped.

Prototype US&S TP-5 "Type G" signal face.
Another issue I had with an earlier design of half-etched hoods for the signals was that the overall geometry and shape did not account for the difficulty of rolling the nickel silver into a round shape without ugly sharp angles and distortion. To correct this in revision 1.4, I first modeled the shape I wanted in Solidworks as nickel silver sheet metal and transposed the geometry back to the flat pattern used for developing the phototool.

Half etched searchlight hood, modeled for correcting bend geometry

Early revision 1.2 signals
Testing of searchlight roundel bounce animation with a completed target head.

Example of different variants that can be built up with just one fret of parts.
Testing of signal aspects for resistor value correlation to brightness and transition cutoff.

Revision 1.2 fret design in SolidWorks

Revision 1.4 fret design in SolidWorks
One of the concerns that arose when designing this fret was that all the parts had to fit together seamlessly for ease of assembly and allow for strong solder joints. This required a lot of dimension checking and calculating any tolerance differences between the design and the hard product. As seen in the revisions above, I was able to increase the packing density and increase prototype fidelity while keeping the same overall size to include spares of parts that are easily damaged for no additional cost.


